Log into the Microsoft Azure Portal
Search for App registrations and click the App registrations link.
Click New registration
Fill in the required information:
Click Register.
After registering, the Application ID is available from the Overview tab. Copy and paste the Application ID and Tenant ID into notepad for later use.
Click the Certificates & secrets tab.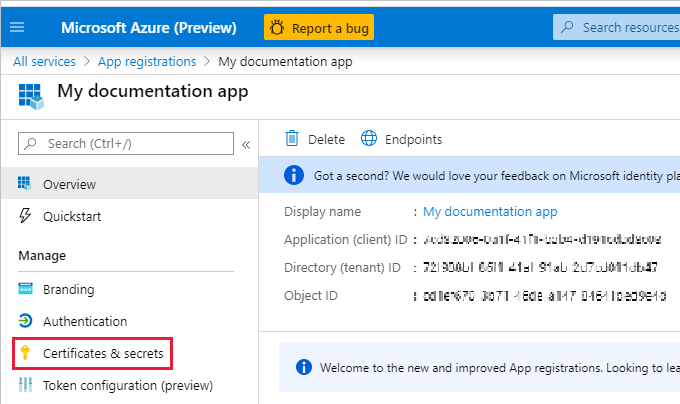
Click New client secret
In the Add a client secret window, enter a description, specify the client secret to never expire, and click Add.
Copy and paste the Client secret value into notepad for later use.
Before finishing this part, make sure you have a copy of these following items for the Power BI Actions Extension in Azure DevOps:
|
The last step in performing an App Registration, and a step that may need to be performed over time as needs change, is to assign permissions to the registration. These are permissions that the app will be allowed to do, providing the authenticating user also has the necessary permission.
Note that if you need the Power BI Tenant.Read.All or Tenant.Write.All permission, those must be assigned via this process.
To add, view, or change permissions, follow the below steps:
Within your registration, click on View API permissions either on the left menu or bottom button. Also note that your Application Client ID used in your application is visible at the top of the page.
View the permissions on this page and add additional ones with the Add a permission button. Note that permissions starting with Tenant. will require an Azure AD / O365 admin to visit this page to click on the “Grant admin consent” button
After clicking on Add a Permission, select Power BI Service.
Ensure that you select “Delegated permissions” (the option to use when the application connects with user credentials). Select the desired permissions and press Add permissions. Note that Tenant.Read.All and Tenant.Write.All permissions will require Azure AD / O365 admin consent before becoming effective. Also note that you need at least one Power BI permission assigned to your application to be able to authenticate as a Power BI application.
Your service principal doesn't have access to any of your Power BI content and APIs. To give the service principal access, create a security group in Azure AD, and add the service principal you created to that security group.
Search for and select Azure Active Directory.
On the Active Directory page, select Groups and then select New group.
The New Group pane will appear and you must fill out the required information.
Add the Azure App Service Principal as a member (for our example we named it PowerBI Anayltics) as well as other users and owners as applicable for your security

Click "Create"![]()
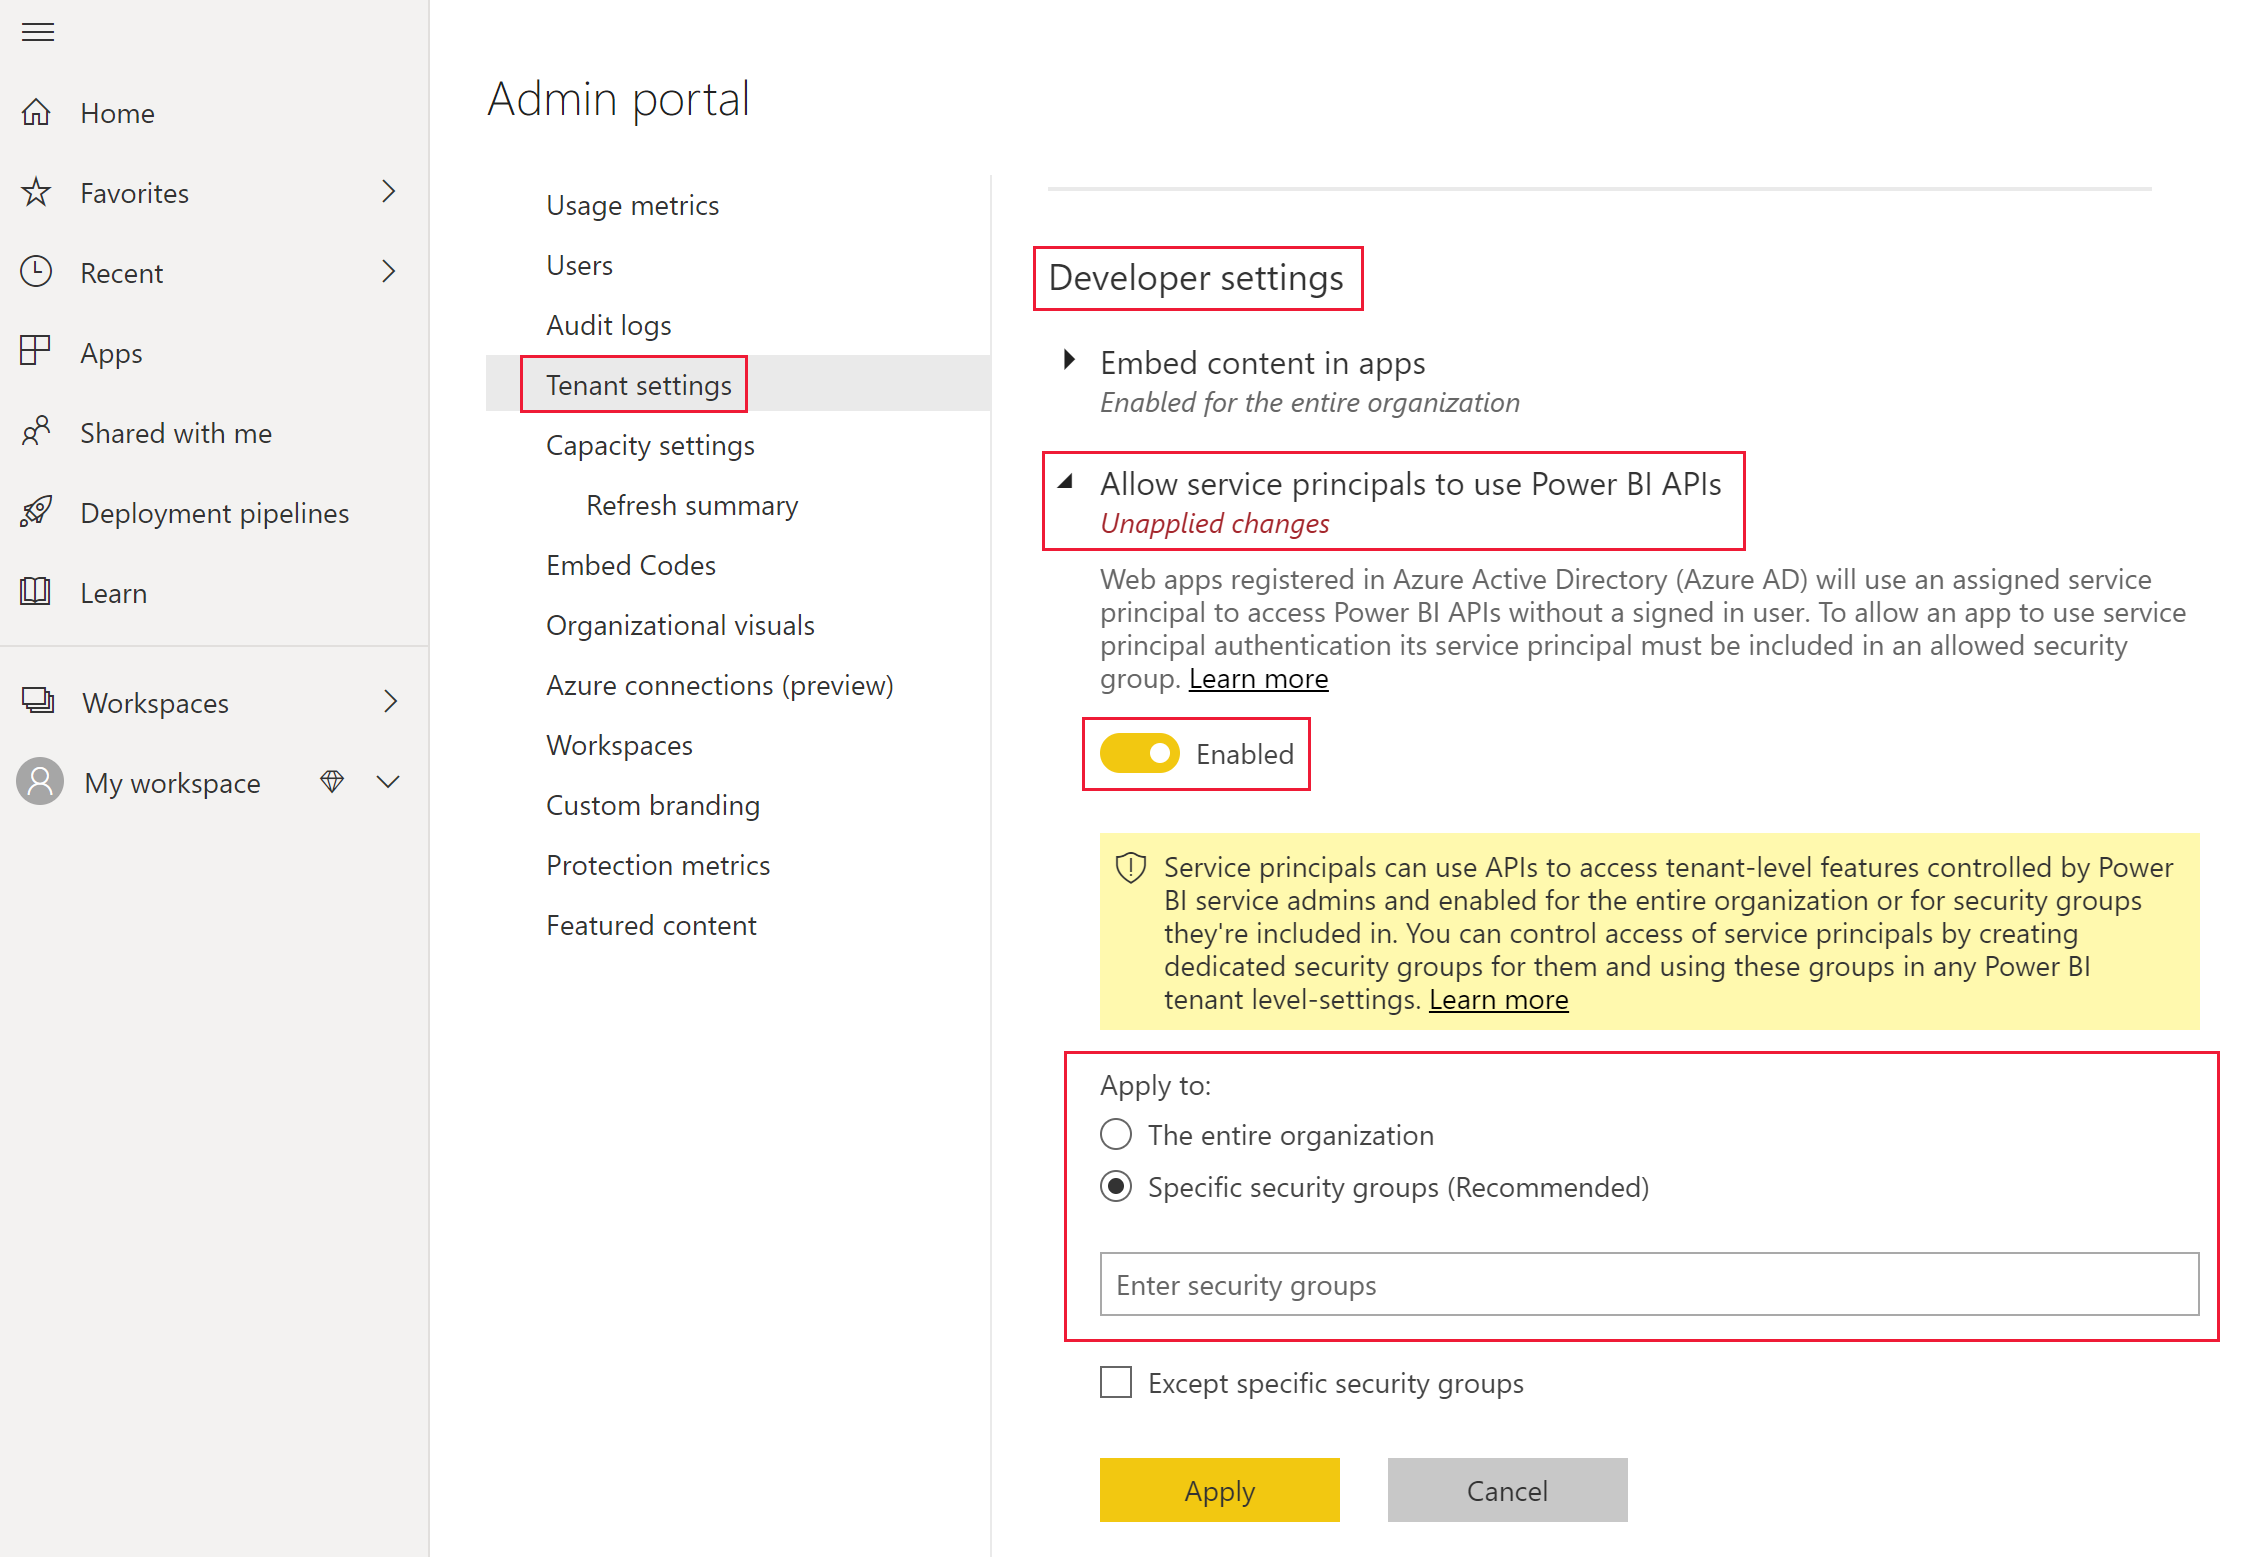
For an Azure AD app to be able to access the Power BI content and APIs, a Power BI admin needs to enable service principal access in the Power BI admin portal.
Add the security group you created in Azure AD, to the specific security group section in the Developer settings.
Service principals have access to any tenant settings they're enabled for. Depending on your admin settings, this includes specific security groups or the entire organization. To restrict service principal access to specific tenant settings, allow access only to specific security groups. Alternatively, you can create a dedicated security group for service principals, and exclude it from the desired tenant settings. |
To enable your Azure AD app access artifacts such as reports, dashboards and datasets in the Power BI service, add the service principal entity as a member or admin to your workspace.
Scroll to the workspace you want to enable access for, and from the More menu, select Workspace access.
Add the service principal as an Admin or Member to the workspace.