Connect to Azure Blob Storage
To import the data from a file and load it into the Power BI report, we must configure the connection between Power BI and the file that is in Azure Blob container. To do that, first, open Power BI Desktop and click on “Get Data” from the Home ribbon: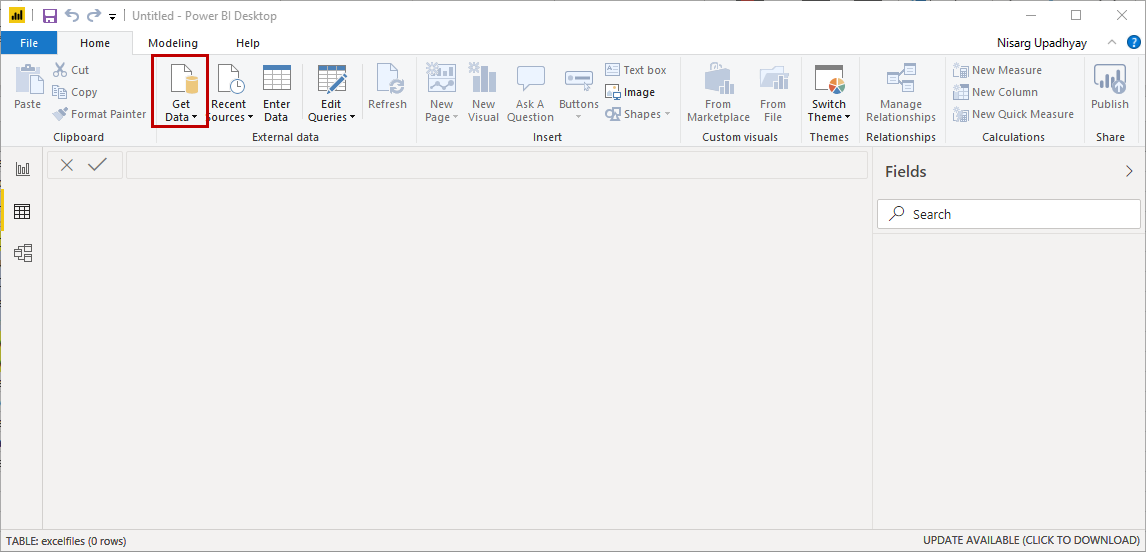
In the “Get Data” dialog box, click on Azure Select “Azure Blob Storage” and click on “Connect”: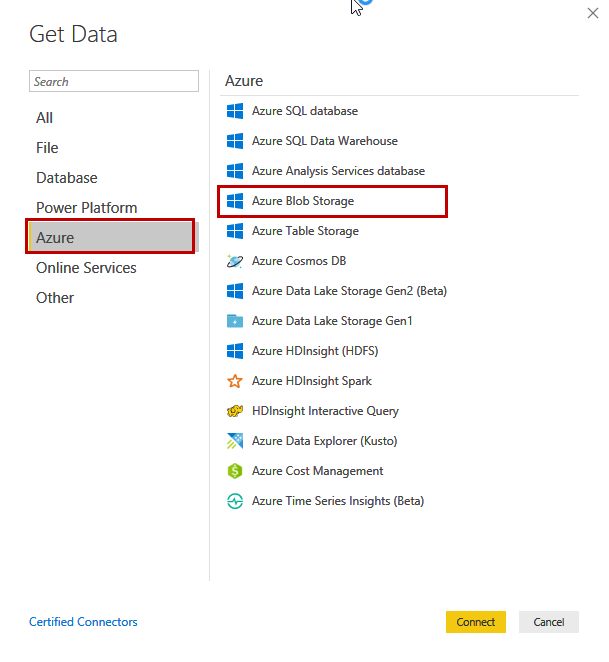
In Azure Blob storage dialog box, provide the name of Azure storage Account or the Base URL of the Azure storage account and click on “OK”: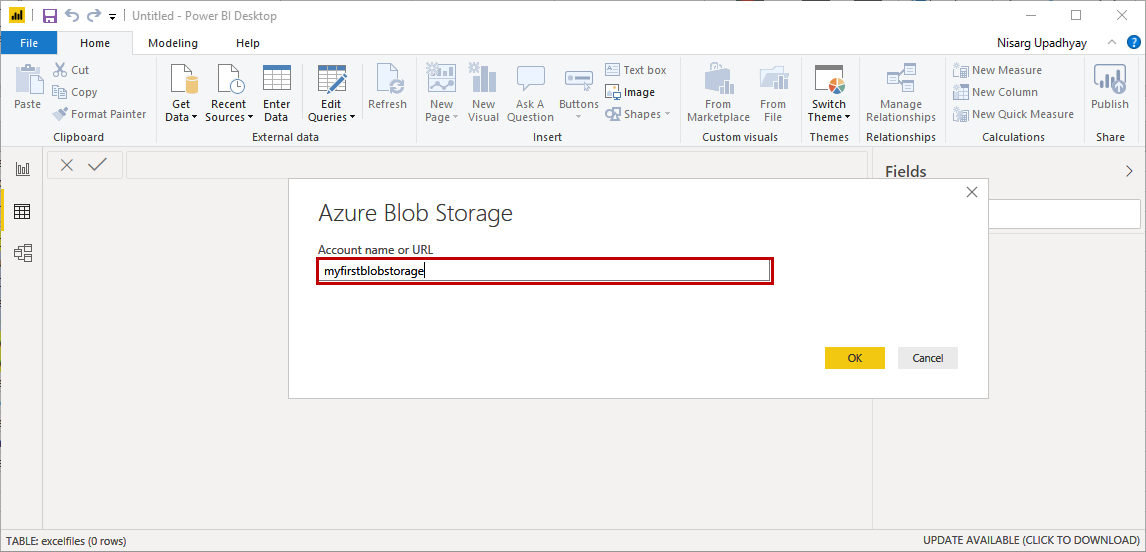
Now to connect to the Azure blob from the Azure portal, we must provide an account access key. You can find this key on the “Access keys” page of the Azure blob storage account. To obtain the access key, open the home page of Azure Portal Select Azure Blob storage account (myfirstblobstorage) select “Access keys”: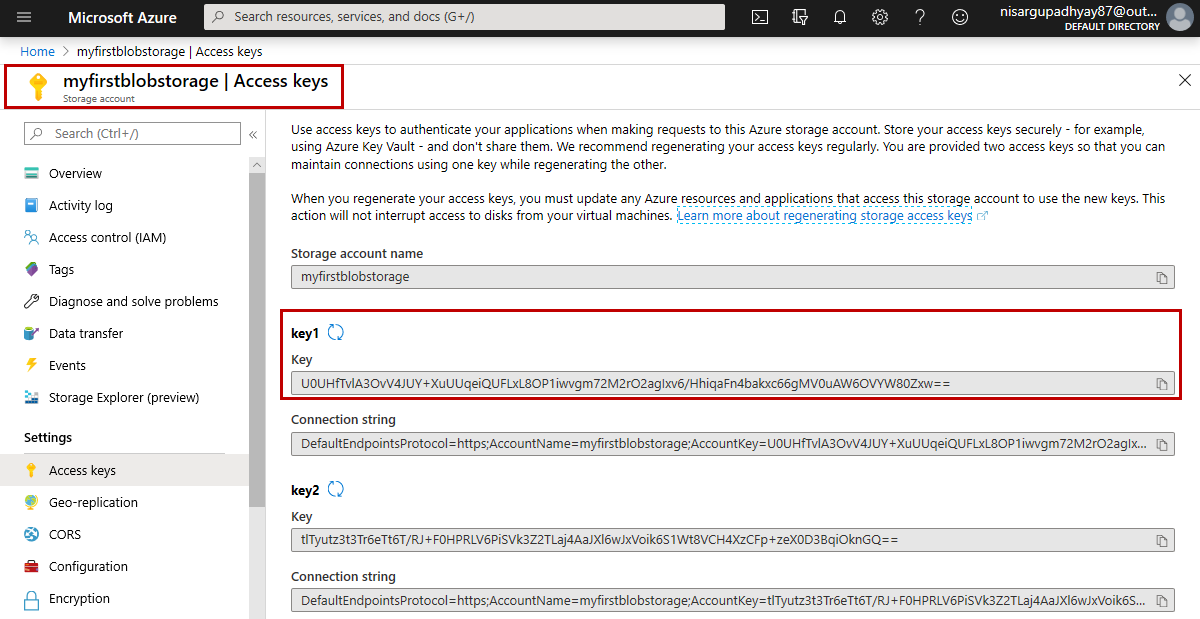
Copy the first key and paste it in the account key page of Power BI and click on connect.
In the navigator dialog box, you can see the list of the storage accounts and the blob containers. As I mentioned, I have created a container named “excelfiles” in the “myfirstblobstorage” blob storage account. On the left pan, you can see the list of the storage accounts and the containers. In the tight pan, you can see the list of files that have been uploaded to the selected container. As I have mentioned above, we are going to import the data of the “Countryregion.csv” file in Power BI hence select the “Countryregion.csv” file. Select the “Countryregion.csv” file and click on the Transform Data button: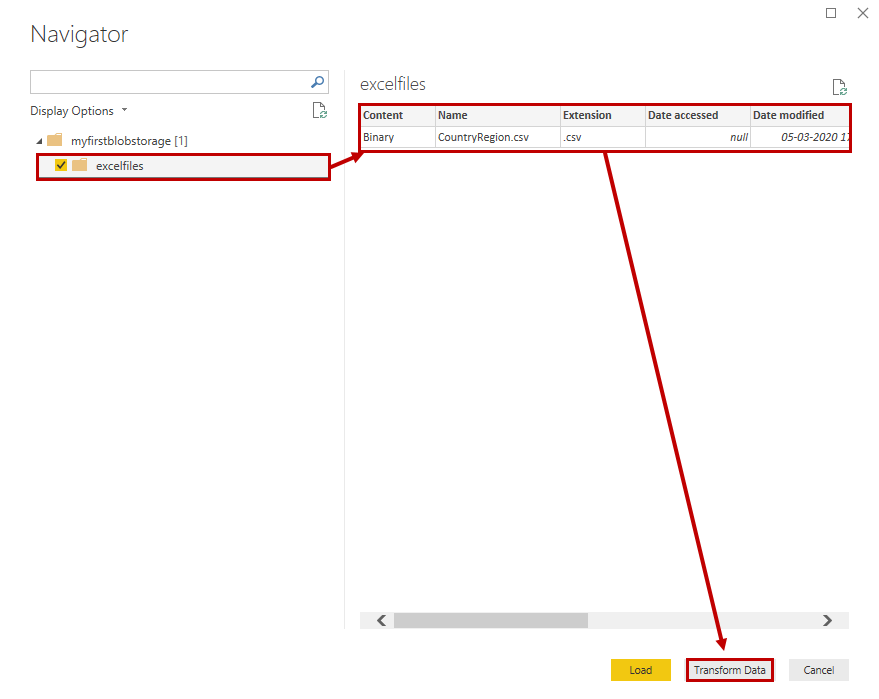
Format the output of the Power Query Editor
When you click on the “Transform Data” button, the Power Query editor window opens. In Power Query Editor, you can see the properties of “Countryregion.csv” file like Name, extension, Date accessed, date modified, date created, and folder path in tabular format. But we want to populate the content of the CSV file, so to import the data of CSV file, click on the “Combine Files” button. It is in the content column the grid view of the query editor window: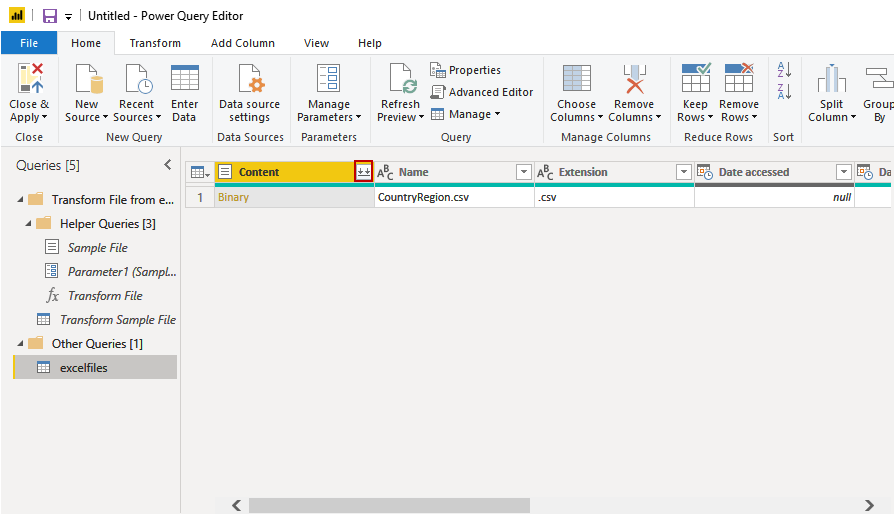
A dialog box named “combine files” opens. You can see the preview of the data within the CSV file. Click on OK: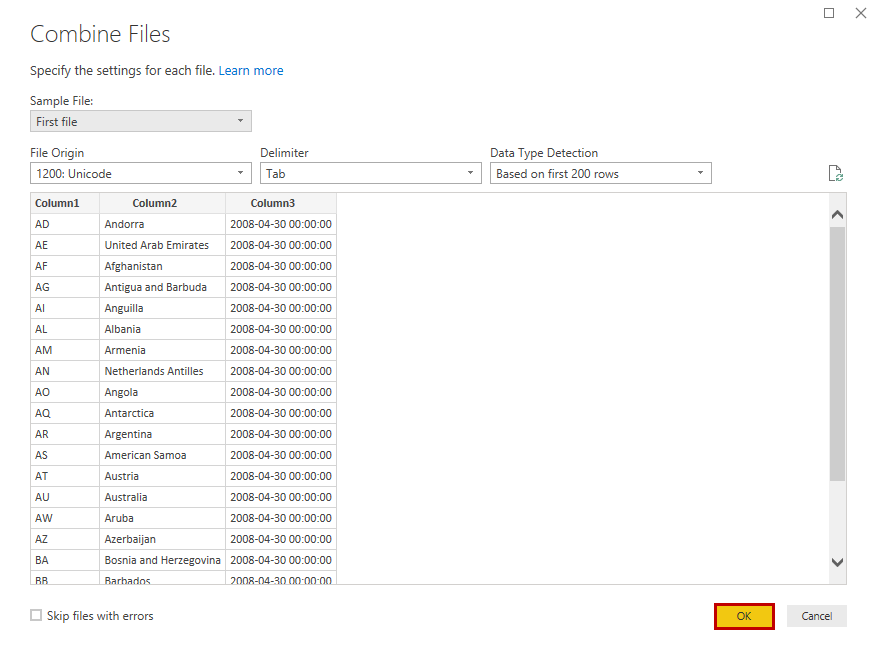
The data will be loaded in the Power Query editor. See the following image: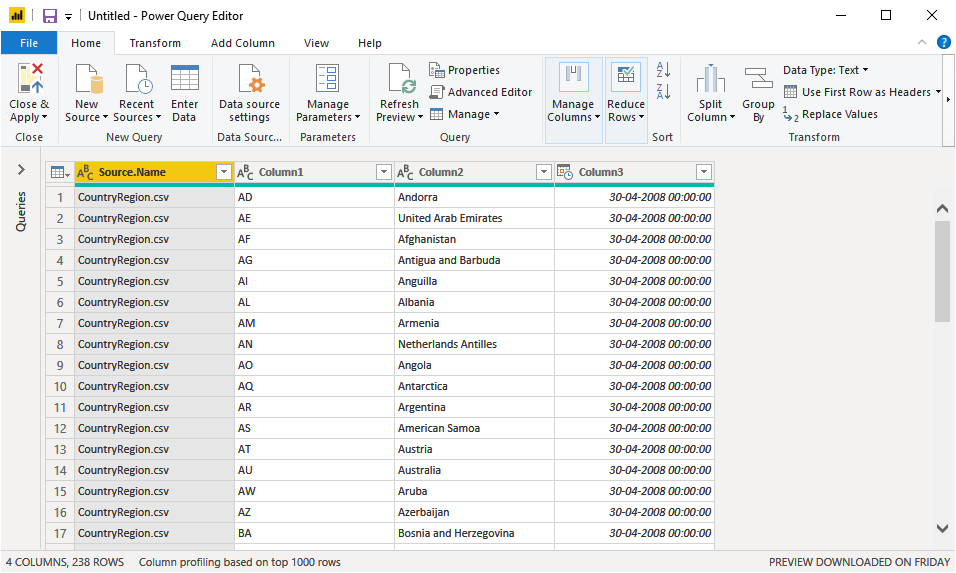
First, rename the headers of the columns for better understanding. To do that, double-click on the header and provide the desired name of the column: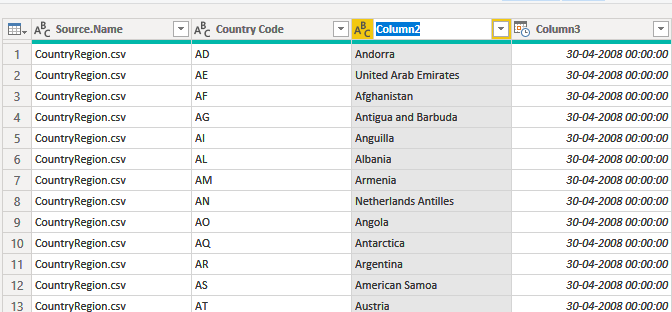
We want to load country code and country name in the Power BI report, so we must select those two columns only. In the power query editor window, we have an option to choose the specific columns. To do that, click on “Choose columns”: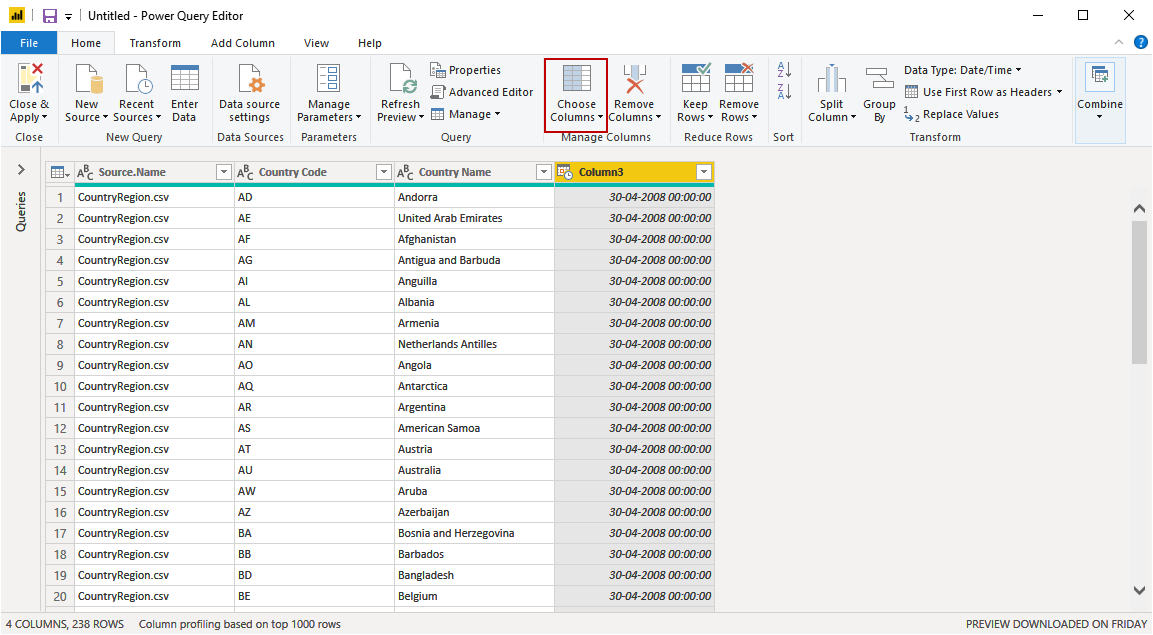
We need the name of the country and country code; therefore, in Choose column dialog box, select “Country code” and “Country Name” columns and click OK: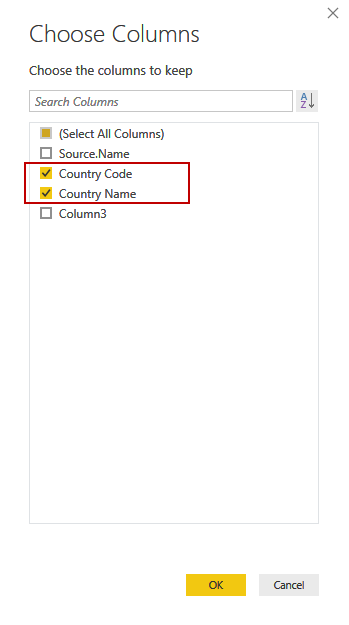
Click OK to close the dialog box
Load data in the Power BI report
Once the required data has been extracted from the file, let us load it in the Power BI report. To do that, click on the “Close & Apply” button in the Home ribbon.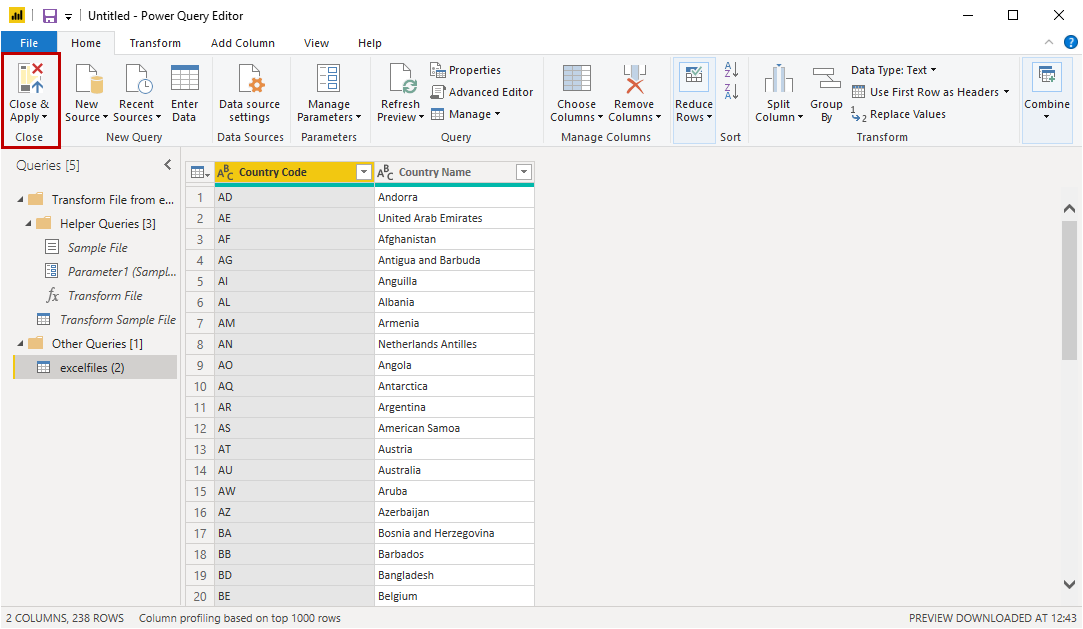
The data will be loaded in the Power BI report. See the following image: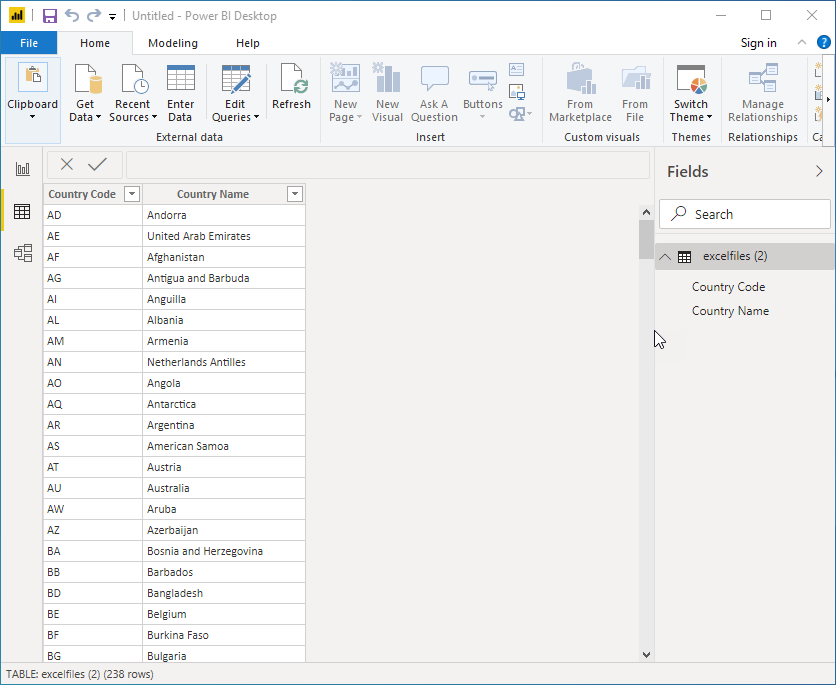
Source
How to access data from Azure Blob Storage using Power BI (sqlshack.com)